Sometimes when creating a VPX instance on your NetScaler SDX you might be in a hurry and accidentally click Done twice which can cause the NetScaler to try provisioning an instance but not complete it since the initial provisioning has been interrupted:

It’s easy to overlook the “Creating NetScaler Instance…” dialog in the bottom right as the SVM and XenServer prepare to provision the instance:

When you try to recreate the instance with the same name you get an error message saying provisioning is in progress but the SVM has no way of talking to this VPX instance so it’s in limbo. Something like “Error – Instance provisioning is already in progress for xxxxxxxx”

When you check the Instance in the GUI the SDX SVM will say there are no instances:

There is a disconnect between the SVM and what’s running on Xenserver at this point. You will need to delete the hidden/partially created orphaned instance manually:
1. You can login to the XenServer via System > XenServer in the SVM as long as you are connected using https in your browser. Alternatively you can use Putty to SSH into the XenServer IP. Make sure you login as root. Default is root/nsroot. When you change the nsroot password on your NetScaler it will change this root password to that new password too. Do not login as the nsroot account itself on your XenServer because it will not have permissions to do much of anything. Login as root only.
2. To show running VM list with RAM and vCPUs displayed:
xl list

3. To show running VM list with UUID which you’ll need to copy and paste in the next steps:
xe vm-list
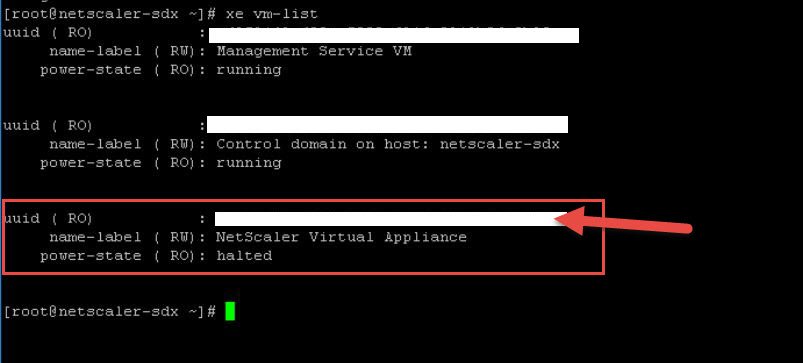
4. The instance must be shutdown to delete it. If it is turned on in a running state then run:
xe vm-shutdown uuid=CopyAndPasteUUIDhere
5. To delete the partially created instance that is hidden from SVM:
xe vm-destroy uuid=CopyAndPasteUUIDhere
6. Now you can go back to NetScaler > Instances and spin up your instance with no issue
Another option is to use XenCenter to log into the XenServer and delete the VM via the XenCenter GUI but this requires logging into the xsconsole and setting the Management interface in order for XenCenter to connect to the XenServer. By default it will not connect but once you are in you can see the SVM and any VMs that might be running like this:
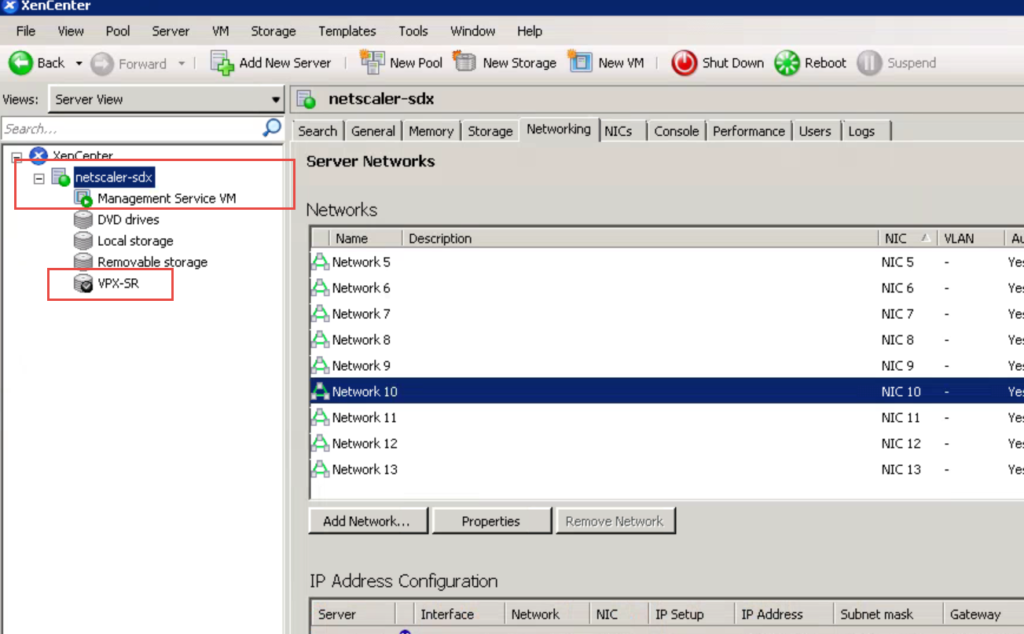
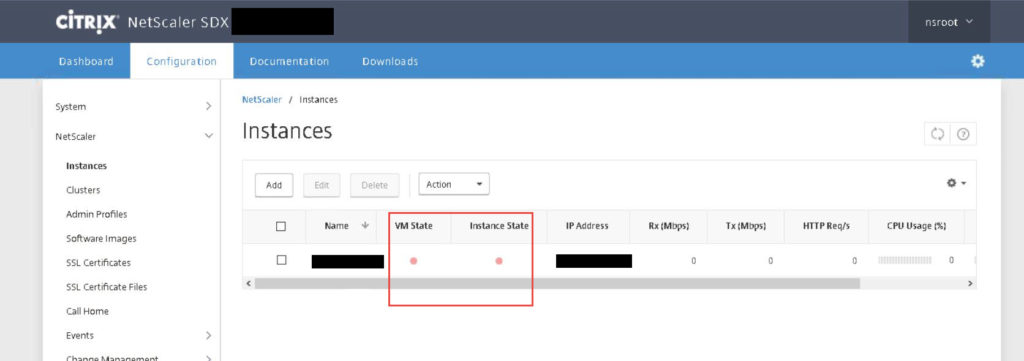
Alternatively, if you have a maintenance window you can reboot the SDX appliance. Once it comes up verify in XenServer the instance is gone. The SVM may now show the partially created instance and it will be red (DOWN):
If you try and delete it you will get an error saying “Request cannot be processed. ns not found with ID xxxxxxxxxxxxxx”:
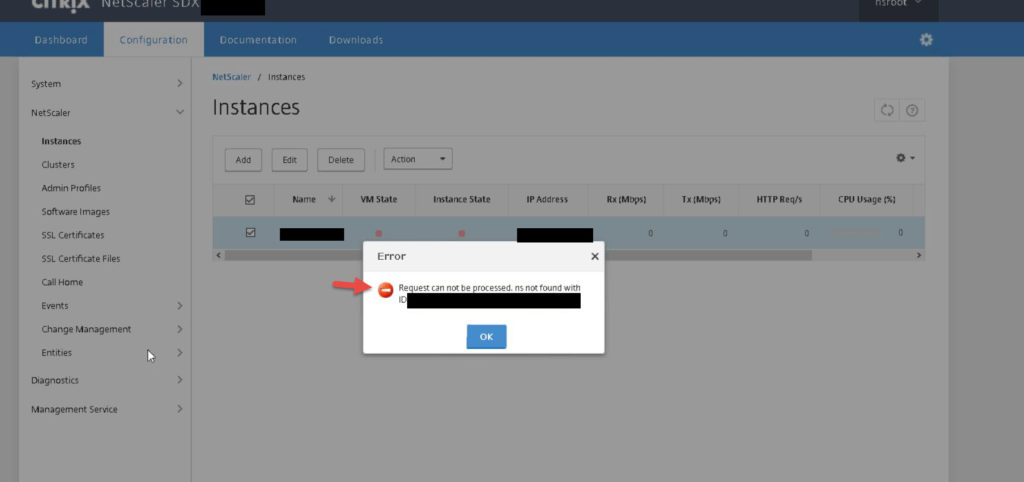
It is remembering the first attempt at creating it. Go and do a Rediscover and it will begin inventorying dom0 on 169.254.0.1. Once it completes the orphaned instance will be deleted from the SVM.
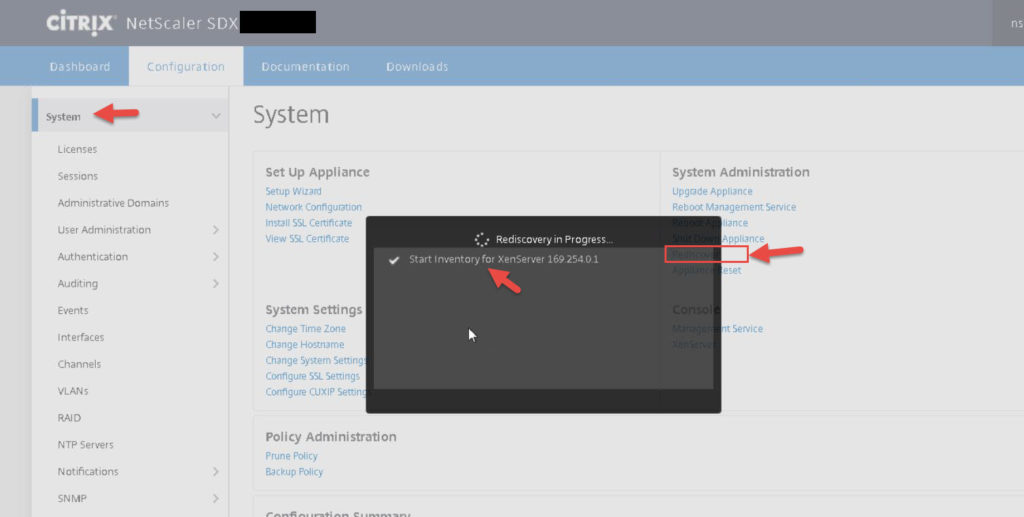
Now you can create an instance with the same name normally. Hope this helps!
Jason Samuel is a visionary product leader and trusted advisor with a proven track record of shaping strategy and driving technology innovation. With extensive expertise in enterprise end-user computing, security, cloud, automation, and virtualization technologies, Jason has become a globally recognized authority in the IT industry. His career spans consulting for hundreds of Fortune 500 enterprises across diverse business sectors worldwide, delivering cutting-edge digital solutions from Citrix, Microsoft, VMware, Amazon, Google, and NVIDIA that seamlessly balance security with exceptional user experiences.
Jason’s leadership is amplified by his dedication to knowledge-sharing as an author, speaker, podcaster, and mentor within the global IT and technology community. Recognized with numerous prestigious awards, Jason’s contributions underscore his commitment to advancing technology and empowering organizations to achieve transformative results. Follow him on LinkedIn.
Disclaimer: Views expressed here are his own and do not reflect the views of his employer, past or present, or any organizations he is affiliated with. Content is for informational or personal purposes only.


Clint
March 21, 2017 at 6:48 PM
Sounds familiar
Henry Heres
March 23, 2017 at 4:18 AM
Also seen this a couple of times, it’s a bit folly that the provisioning is placed in the right end corner.
My resolvement was to just rediscover the instance and then it was visible to delete.
Carl Stalhood
August 2, 2017 at 11:10 AM
thanks for the info!