A few days ago we saw the release of XenApp & XenDesktop 7.11, a huge release in terms of features. As a CTP I’ve had the privilege of working on an early build in my lab (thank you Juan & XA/XD product team!) and I tell you, the feature set in this release really brings FMA architecture to a well rounded solution with some of the previous IMA based based features present in 6.5 and the forward momentum of were enterprises are going now, a hybrid cloud environment with workloads delivered from anywhere.
There will be many articles released in the upcoming weeks from Citrix and several of my CTP peers on this release. You can read Allen’s post about XA/XD 7.11 about it here to start off with:
https://www.citrix.com/blogs/2016/09/14/xenapp-and-xendesktop-7-11-is-here/
followed by Feng’s post on StoreFront 3.7 here:
https://www.citrix.com/blogs/2016/09/14/storefront-3-7-has-been-released/
and Craig’s post on Self Service Password Reset in XA/XD 7.11 and StoreFront 3.7 here:
https://www.citrix.com/blogs/2016/09/14/self-service-password-reset-for-fma/
Now that you have a primer on what to expect as you perform your updates, I’d like to spotlight a re-introduced feature from the IMA days that you’re now able to do in 7.11, the ability to publish content. There’s so much innovation to cover in the posts above, I just wanted to give this feature a little extra attention first and let me explain why.
In XenApp 6.5 you had the ability to publish content such as a website URL or file like a Word doc, PDF, etc. so it would appear right next to your application icons in Web Interface/StoreFront. A common use case for example was putting instructions for an application right next to the app. When you clicked on the app it would pass the URL to the client’s native browser and open right up lickity split, no waiting for it to launch like a regular app or desktop would. This was a wonderful feature on tablets like iPads especially because now you had a really nice touch based user experience on these docs and websites with the integration between Receiver and the native OS. When the re-architecture of XenApp happened and we moved from IMA to FMA, this feature did not make it over and Citrix admins/engineers had to come up with workarounds to keep application owners and end users happy. None of these workaround ever worked as well as published content in my opinion. There were quite a few features that didn’t translate to FMA and the feature had to be re-architected. I went as far as submitting RFEs for this in the early 7.x days because users were chasing after me for it.
I can say now with 7.11 and playing with the re-introduced publish content feature, it is back and working well for my old uses cases. Read up on it here:
https://docs.citrix.com/en-us/xenapp-and-xendesktop/7-11/install-configure/publish-content.html
Check out all the things you can publish to the client now. Just make sure the content is accessible and you’re golden coming in through StoreFront or NetScaler Gateway SSL ICA Proxy to access it:
- HTML Web site address (http://www.citrix.com)
- Document file on a Web server (https://www.citrix.com/press/pressrelease.doc)
- Directory on an FTP server (ftp://ftp.citrix.com/code)
- Document file on an FTP server (ftp://ftp.citrix.com/code/Readme.txt)
- UNC file path (file://myServer/myShare/myFile.asf) or (\\myServer\myShare\myFile.asf)
- UNC directory path (file://myServer/myShare or \\myServer\myShare)
Now let me show you how to do it. Unfortunately it hasn’t made it into the GUI yet but it will in a future update I’m sure. For now you have to use PowerShell to publish your content.
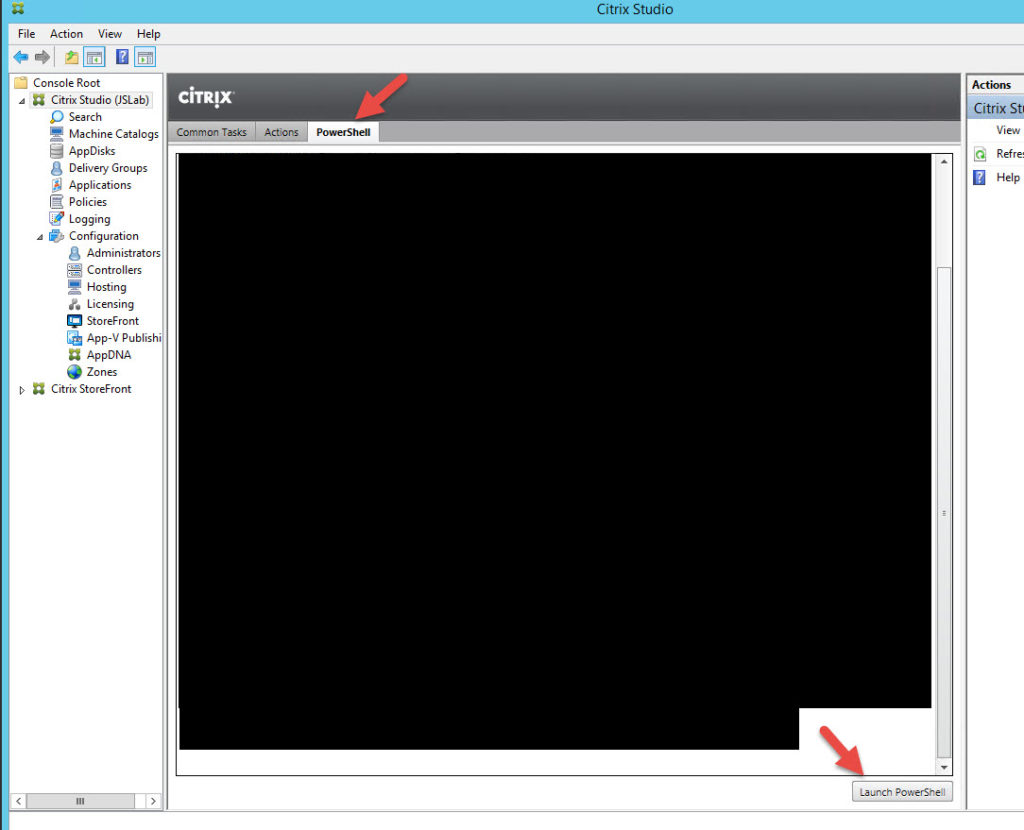
1. Open up Citrix Studio and click Launch PowerShell under the PowerShell tab:
2. Type in the following get-help command and it will ask you to update the help files, hit Y for Yes:
|
1 |
get-help new-brokerapplication -detailed |
it will take a few minutes to finish updating.
3. Once it’s done just scroll up and you should see a few new things. There’s a new ApplicationType called “PublishedContent”. There is also an example of usage:
4. Now let’s actually publish some content. Let’s publish a PDF link sitting on a web server:
|
1 |
New-BrokerApplication -ApplicationType PublishedContent -Name "NetScaler PDF" -CommandLineExecutable "https://www.citrix.com/content/dam/citrix/en_us/documents/products-solutions/netscaler-data-sheet.pdf" -DesktopGroup "XenApp Users" |
Hopefully all the switches above are self explanatory, just modify as needed for your environment. You’ll notice it will publish it as “PublishedContent”:
5. Now go to Studio and refresh your apps. You’ll notice the app and the type is set to “PublishedContent” but it has one of those default ugly black icons:

and in StoreFront you’ll get the same. If you publish serveral pieces of content this can get ugly and confusing very fast for your users:

6. If you edit the properties you’ll see there is no way to add a custom icon like regular apps. Compare a regular app like Notepad vs. the URL you just created. The icon is set under Delivery which doesn’t exist:
vs.
7. Glenn from the product development team was kind enough to point me in the right direction to do this. The old method of using a Base64 encoded icon and forcing it into the SQL DB still works and is covered here by Mick:
https://www.citrix.com/blogs/2013/08/21/xd-tipster-changing-delivery-group-icons-revisited-xd7/
8. Grab a picture off Google image search. In my case I wanted a PDF icon so I grabbed this file called “pdf-flat.png”:

9. Now we need to convert the image to .ico format. The site Mick uses requires Flash and since I refuse to run the Flash plugin if I can help it, use https://www.icoconverter.com/ and check all the boxes, especially 256 pixels option so you get the largest icon possible:

it will by default try and save it as a favicon.ico but just rename it “pdf-flat.ico” or whatever makes sense for you.
10. Now go to http://www.motobit.com/util/base64-decoder-encoder.asp to convert that to Base64. If you’ve seen one of my NetScaler presentations you’ll remember you can actually save images onto your NetScaler in a similar fashion for emergency scenarios when all your web servers are down and you still need some kind of web presence on the Internet.
and copy out the result to Notepad:

11. Now go back to Studio and type in this with the code pasted in place of where it says Base64 String below:
|
1 |
New-BrokerIcon -EnCodedIconData “Base64 String” |
Yeah it’s a lot of stuff to paste. When you paste it your PowerSHell prompt will look like you’re in the Matrix:
Once you press enter, you’ll probably start thinking you just corrupted your whole SQL DB. Don’t worry, it will take a few seconds and you’ll see a UID eventually:
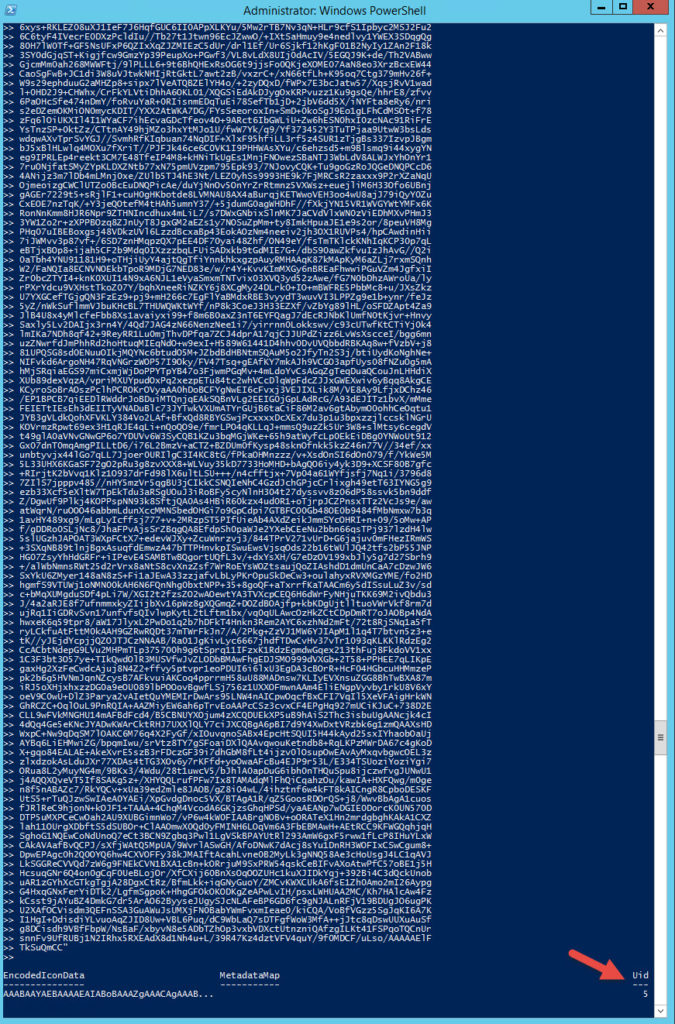
12. Now assign the UID to the actual published app. Don’t type in Mick’s commands with a delivery group, you need to type in the name of the Application here instead:
|
1 |
Set-BrokerApplication -name "NetScaler PDF" -IconUid 5 |
and it will look like nothing happened:
![]()
13. Now go back to Studio and refresh. It may actually stutter for a few seconds while it thinks about it during the refresh, don’t worry just give it a second and you should see the new icon is now populated:
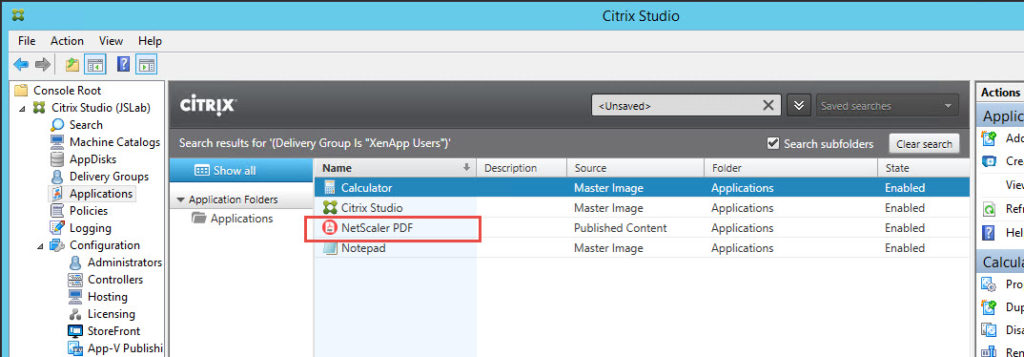
Look how nice that looks in StoreFront!

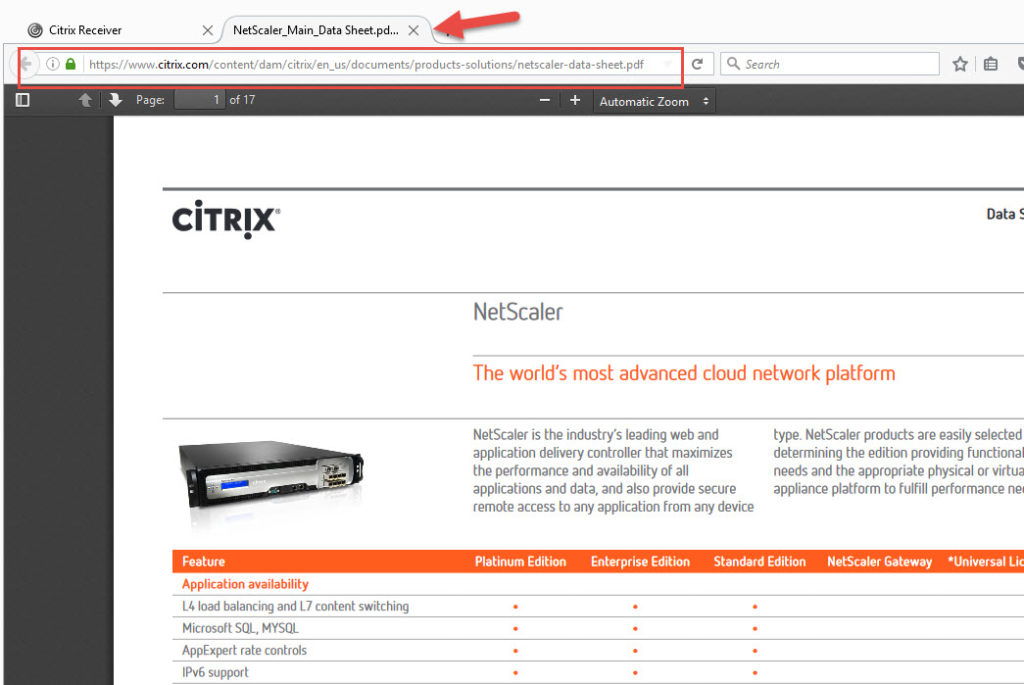
14. Now try out your new content with StoreFront. When you click on the PDF icon it should open up the URL in a new tab in your browser just fine!
So yeah, a small little feature but in my opinion huge because it shows Citrix listens to it’s customers. You want something and have a good use case for it, they’ll make it happen. I’m sure many people will take advantage of this. Just one more reason to keep your XenApp/XenDesktop deployments up to date!
Jason Samuel is a visionary product leader and trusted advisor with a proven track record of shaping strategy and driving technology innovation. With extensive expertise in enterprise end-user computing, security, cloud, automation, and virtualization technologies, Jason has become a globally recognized authority in the IT industry. His career spans consulting for hundreds of Fortune 500 enterprises across diverse business sectors worldwide, delivering cutting-edge digital solutions from Citrix, Microsoft, VMware, Amazon, Google, and NVIDIA that seamlessly balance security with exceptional user experiences.
Jason’s leadership is amplified by his dedication to knowledge-sharing as an author, speaker, podcaster, and mentor within the global IT and technology community. Recognized with numerous prestigious awards, Jason’s contributions underscore his commitment to advancing technology and empowering organizations to achieve transformative results. Follow him on LinkedIn.
Disclaimer: Views expressed here are his own and do not reflect the views of his employer, past or present, or any organizations he is affiliated with. Content is for informational or personal purposes only.


Alain Assaf
October 4, 2016 at 10:41 AM
Jason, this is a great explanation. I can’t wait to try this out in XenApp 7.11. I appreciate all the articles you do and you’ve helped me immensely in my work.
Thanks,
Alain
Jason Samuel
October 4, 2016 at 1:51 PM
Glad to help Alain!! Thanks for the comment!
David Prows
October 31, 2016 at 12:38 PM
Thank you for your explanation. I do have one issue I can’t seem to solve with it. I can’t get published content to “launch” from Receiver 4.5 desktop install, but they work fine from Receiver for Web. Any thoughts?
Johan R
August 23, 2017 at 2:32 PM
Hello
You can do the following to get the icon into the DB Without having to get the icon converted manually to BASE64
Get the .ICO File to your System
then issue the following commands to ge it to the DB without going to encode it as BASE64
PS C:\> Get-BrokerIcon -FileName C:\Windows\write.exe -Index 0 | New-BrokerIcon
EncodedIconData MetadataMap Uid
————— ———– —
AAABAAIAICAQAAEABADwAgAAJgAAABAQEAAB… 82
Felipe A
May 4, 2018 at 11:44 AM
Shame we still don’t have this in Studio GUI to create and modify Icons
Can’t really understand what is the difficulty of adding this feature.
That being said… This guide is awesome!
Btw, I tried the method to import the ico provided by Johan R and it worked as a charm!
The only difference in what I did was that I pointed to the .ico file itself instead of the index of an .exe.
To make it clear, an example:
Get-BrokerIcon -FileName “C:\temp\example.ico” | New-BrokerIcon